
The Launch Pro Knee Pad is the next evolution to knee protection from Fox.
Features:
* Silicone gripper behind the knee to keep the pad in place.
* Pre-curved ergonomic fit

Features:
* Silicone gripper behind the knee to keep the pad in place.
* Pre-curved ergonomic fit
 Most bikes come with identical tires front and rear. This is all right for general use, but if you want to optimize your bike, you should consider using different tires front and rear. The front and rear tires have different loadings and different requirements.
Narrower Front, Wider Rear
Wider Front, Narrower Rear
A wider front tire makes sense in many applications, however, when handling and ride comfort are considered. A wider tire will generally provide better cornering traction than a narrower one, assuming appropriate inflation pressure.
Bikes that are used some of the time on loose surfaces often benefit from a wider front tire, with a fairly agressive tread, coupled with a somewhat narrower, smoother rear tire.
Some mountain bike tires come in matched sets, with diffrerent tread front/rear. The front tires tend to have the knobs set up more or less parallel to the direction of travel, for improved lateral grip and better steering control. The rears tend to have transverse knobs for driving/braking traction.
source: http://www.sheldonbrown.com/tires.html
Square Taper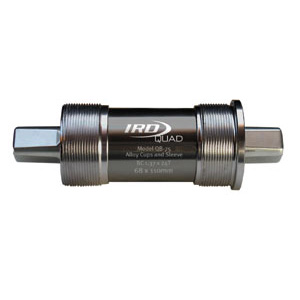 This is currently the most popular design by far. This interface consists of a spindle with square tapered ends which fit into square tapered holes in each crank. Tightening the two together creates a relatively efficient and simple interface.

ISIS Drive
 ISIS Drive, the International Splined Interface Standard, is an open standard splined specification for the interface between a bicycle crankset and the bottom bracket spindle. It was created by King Cycle Group, Truvativ, and Race Face in response to the proprietary Shimano Octalink splined bottom bracket standard. Because the Shimano splined interface is covered by patents, the ISIS Group created the standard and put it in the public domain so that other companies could make interoperable components. As the standards are separate, parts made for one are incompatible with those made from the other; an Octalink-standard bottom bracket (8 spline) cannot connect to an ISIS crankset (10 spline) and vice versa. One shortcoming in the design of the ISIS bottom bracket is the decreased bearing life compared to square taper bottom brackets. This is because it uses a larger diameter spindle in the same sized shell, so the bearings are smaller. Arguably, it was this shortcoming that lead to the development of external bearing designs.
Outboard / External Bearing
 Many current designs are now using an integrated bottom bracket with outboard bearings. This is an attempt to address several issues associated with weight and stiffness. Because of the relatively small 1.37" (36 mm for shells threaded to the Italian standard) diameter shell, designs that place the bearings inside the shell can either have large bearings and a thinner spindle, which lacks stiffness, or smaller bearings and a thicker spindle (such as the original Shimano Octalink), which is stiff but less durable. External bearings allow for a large diameter (hence stiff) and hollow (hence light) bottom bracket spindle. They also offer more distance between the two bearing surfaces which contributes to stiffness while allowing lighter components.
source: http://en.wikipedia.org/wiki/Bottom_bracket


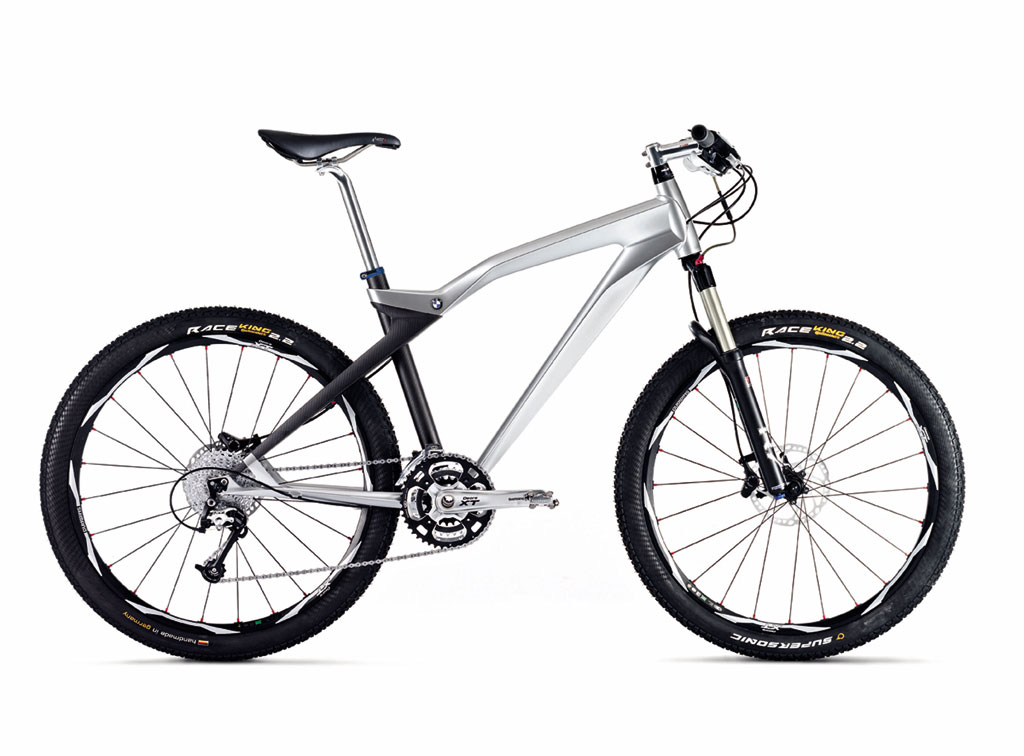
Lew Racing proudly trumpets their Pro VT-1 as “the strongest 880 gram wheel set in the world PERIOD.” The laminate is created through a born and carbon combination process called DEX-LCM, developed by Lew Aerospace for the Department of Defense. Even the spokes are aerodynamic, using a NACA (National Advisory Committee for Aeronautics) airfoil design. Despite weighing only 3 grams apiece, the Pro VT-1’s spokes are actually stronger than those of a normal bicycle wheel.

The world’s most expensive bicycle is a limited edition item—only ten will be made. They can be purchased and delivered to anywhere in the world for €80,000 (US $114,464).
SLICK TIRE
 Many bike tires made for street use are slick. The tires appear almost smooth with a barely perceptible tread pattern. These are mainly designed for city touring or for commuters.
 SEMI-SLICK TIRE
Somewhere between knobbies and slicks, these tires are designed with a smooth center, for minimal rolling resistance and faster acceleration, and aggressive treads on the side to help with cornering.

Tires designed with an inverted tread have less rolling resistance than those with any type of regular tread, but offer more grip—and rolling resistance—than slicks. Use these tires if you suspect you might venture off asphalt or ride on roads with lots of ruts and potholes.

Different knobby tread styles are designed for specific trail situations.
SCOTT GENIUS 2009 Bike.
The World's Lightest Marathon/Trail Bike with 150mm travel.
TIRE SEALANT
This is a non-toxic goop that you put inside the tube through the valve system. It automatically seals small punctures.
TIRE LINER
A tire liner is a long strip of tough material that you put between the tube and the tire.
Thorn-Resistant Tubes
These thick tubes provide more protection against punctures.
KEVLAR BEAD TIRES
These kind of tires is great at resisting punctures. The main disadvantage is a slightly harsher ride, and the fact that it's a bit hard to get the tires on and off the rims since they're so stiff. Kevlar beaded tires are lighter and often are made with higher quality rubber than the wire bead versions. If you're going to use only one anti-flat product (instead of a combination of products), this is probably your best bet.
AIR-FREE TUBES OR TIRES
These are semi-solid rubber, with no air, so they can't go flat. One can get either an air-free tire, which replaces the whole tube & tire (e.g. Greentyre), or an air-free tube, which fits inside one's existing tire.

Any one of these products by itself may afford some protection, but using more than one can become a powerful combination.
A bike pedal is the part of a bike that the rider pushes with his foot to propel the bike. It provides the connection between the biker's foot or shoe and the crank allowing the leg to turn the bottom bracket axle. Pedals usually consist of a spindle that threads into the end of the crank and a body, on which the foot rests or is attached, that is free to rotate on bearings with respect to the spindle.
Flat and Platform Pedals
 Platform pedals are pedals with a relatively large flat area for the foot to rest on, in contrast to the quill pedal which has very little surface area. In mountain biking and BMX, platform pedals typically refer to any flat pedal without a cage. MTB and BMX riders prefer platforms to cage pedals because they offer more grip using short metal studs, are rounder and do less damage to a rider's shins and ankles during an accident. Cage pedals often scrape skin and flesh off the shin if the rider stops short and loses footing of the pedal.
Quill Pedals
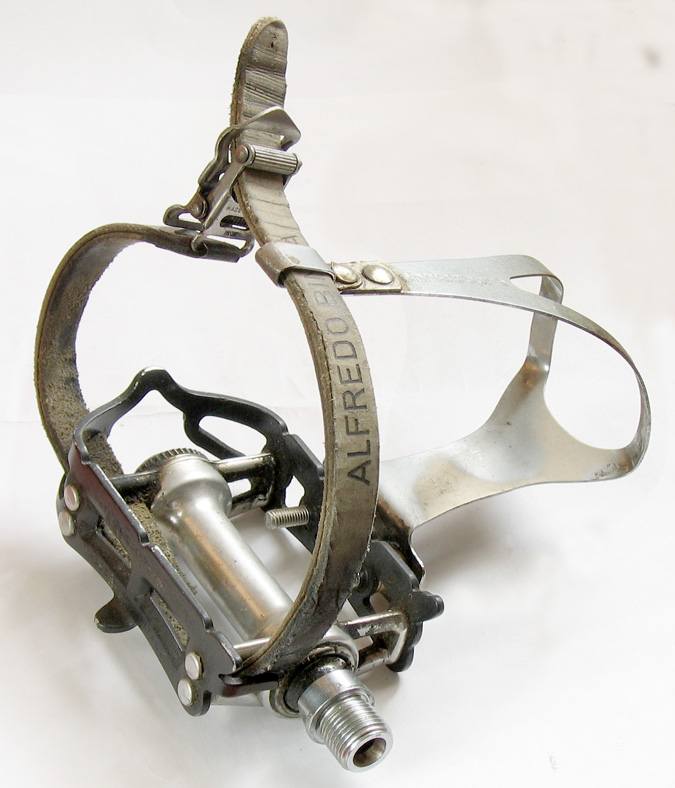
Cages refer to pedals that can accommodate toe clips and not necessarily the clips themselves, and are more specifically called quill pedals. The actual cage is the outer part of a conventional pedal, the part that comes in contact with the rider's shoe and has holes where toe clips can be secured by screws. Toe straps used with clips further secure the foot to the pedal and to allow the cyclist to apply power on the upstroke by pulling against the pedal. The main difference between track, road, and touring quill pedals is width. Track pedals are narrow and the front and back plates of the cage are separate, road being a little wider with a one piece cage in a shape of a sideways "U", and touring being the widest to allow for comfort when used with wider, non-racing shoes during longer rides.
Clipless Pedals
 Clipless pedals (also clip-in or step-in) require a special cycling shoe with a cleat fitted to the sole, which locks into a mechanism in the pedal, holding the shoe firmly to the pedal. Most of today's clipless pedals lock to the cleats when stepped together firmly, and unlock with when the foot is twisted outward. Clipless refers to the lack of an external toe clip (cage), but not to be confused with platform pedals without toe clips.
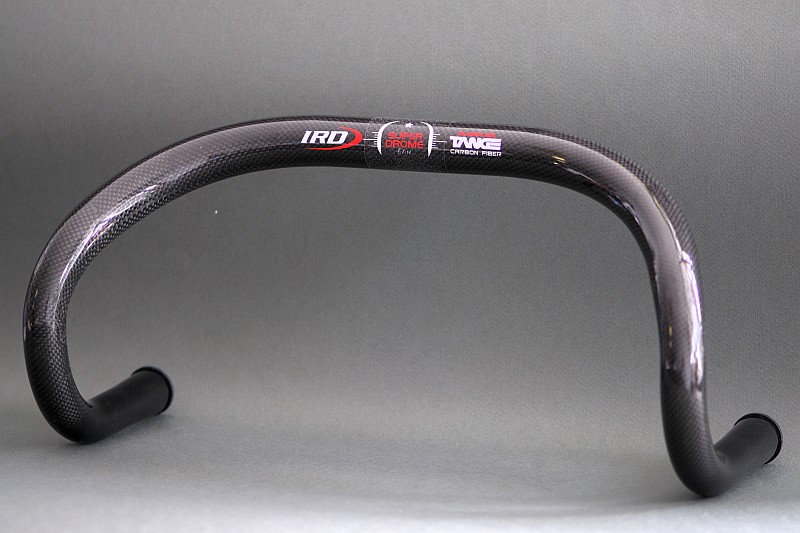
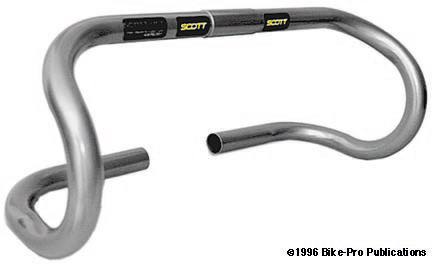
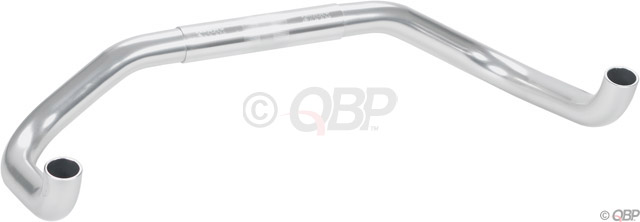
Handlebars come in a variety of types designed for particular types of riding.
 Drop handlebars, as used on road or track bicycles, may have a shallow or deep drop. Drop bars may have one or two longitudinal indentations so that the brake and shift cables protrude less when they are wrapped under the bar tape. They may also have a flattened (ovalized) top section to provide more comfortable support for the hands.
Syntace Racelite 2014, Drop Bar, Medium, Black 42cm
Track
 Track drop bars are a variation of drop bars designed for the typical riding positions of track bicycle racers. Track drops are characterized by large, sweeping ramps, effectively precluding the top and brake hood hand positions, but promoting the rider's use of the ends, or "hooks". Track bars are designed for use without brake levers, but recently experienced a surge in popularity on use with fixed gear bikes, and as such are have been adapted to fit levers and hand positions.
Nitto Track 40cm 25.4 Alloy Silver bar
Touring or Trekking
 Sometimes referred to as "Butterfly" bars, these are commonly encountered in continental Europe. They typically consist of a broken figure-of-eight arrangement mounted horizontally on the stem. This style of bar allows the rider to remain relatively upright while at the same time providing a wide range of hand positions for comfort on long duration rides.
 The shape of the drop may be a simple, traditional curve, or it can have a flat spot (straight section) which some riders find to be more comfortable for their hands. These bars may be described as ergo or anatomic.
Easton EA50 Ergo Road Cycling Handlebar - 31.8mm
 At one time, manufactures and racers experimented with drop-in bars that had an additional extension in toward the head tube at the rear end of the drops. This was intended to offer an even more aerodynamic position, due to low and narrow placement of the hands, than just the drops, while still remaining legal for mass-start races. Their popularity has since waned.
Flat or Riser
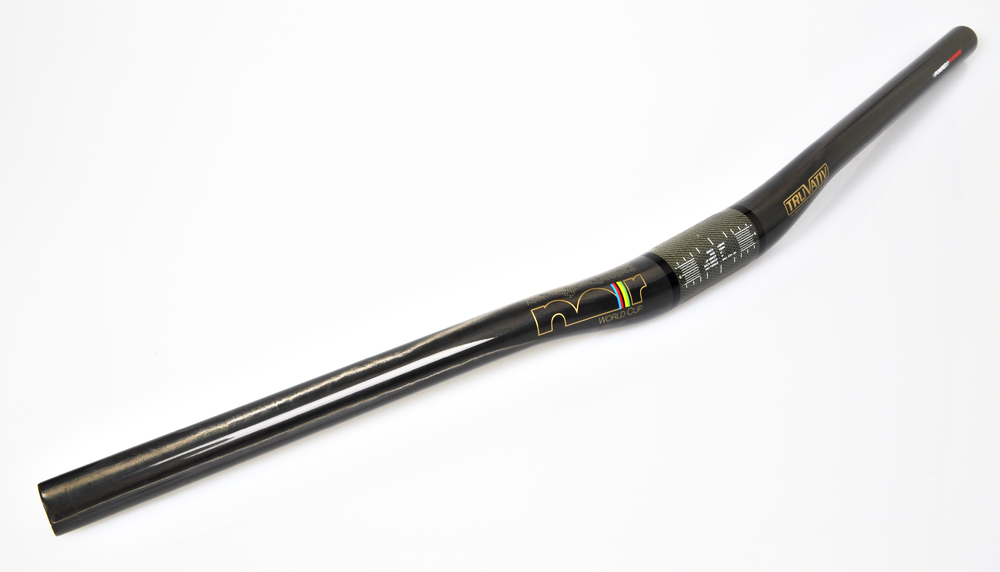 "Flat" or "riser" bars are the standard handlebars equipped on mountain bikes, and recently on fixed gear bicycles. Flat bars are comprised of a nearly-straight tube, slightly bent toward the rider. Risers are a variation in which the outer sections of the bars rise from the center clamp area. Flat and riser bars may be appended with bar ends, providing more hand positions.
 North Road bars are swept back toward the rider, with each grip ending nearly parallel to each other and the bike. This type of bar was equipped with three-speed and single speed Raleighs, Schwinns, and other three-speed bikes well into the 1980s, as well as various European utility bikes and roadsters. They have recently enjoyed a resurgence in popularity on some hybrid bicycles, city bikes, and comfort models. They are also known as "Townie", "Tourist", or "Comfort" bars.
 Triathlon bars or aerobars include various styles of aerodynamic handlebars for racing bicycles and particularly time trial bicycles. Included are narrow, bolt-on extensions that draw the body forward into a tucked position, pursuit bars that spread the arms of the rider but drops the torso into a slightly lower position, and integrated units that combine elements of both designs. These are commonly used in triathlons and time trial events on road and track. However, they are illegal in most mass start road races or any other event where drafting is permitted because, while aerodynamically advantageous, they tend to draw the hands away from brakes, make the rider slightly more unstable on the bike, and can be dangerous in the event of an accident.
Profile-Design T2 Clip-on Aerobar
Pursuit
 Pursuit bars, or Bullhorn handlebars, curve forward away from the rider. They are often used with dedicated triathlon bars and are also popular, by themselves, on track, single-speed, and fixed-gear bicycles.
Most mountain bikes have Shimano shifters & derailleurs. SRAM is the other main vendor. Shimano makes a wide range. Below are some models of Shimano rear derailleurs.
 SHIMANO TOURNEY - Mainly designed for riding around the neighborhood.
 SHIMANO ALTUS - Sufficient for paved or very easy trails; avoid hills.
 SHIMANO ACERA - Slightly better, but won't shift well under stress; capable for easy casual riding.
 SHIMANO ALIVIO - Minimal capable for recreational riding; will handle some hard riding.
 SHIMANO STX / DEORE - Entry-level components for hard riding; tough & reliable.
 SHIMANO LX - The minimum standard for hard riding. Reliable & responsive.
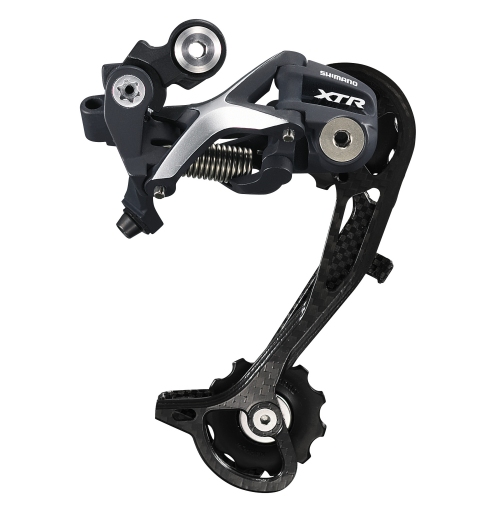 SHIMANO XTR - Light, responsive racing components; tend to be quite expensive; often sacrifices toughness for responsiveness.
A folding bike is a bike that incorporates joints in the frame and handlebar stem that permit it to be broken down into a more compact size. Most of these bikes have wheels of 20 inch (51 cm) diameter or less. Folding bikes can be taken on public transport and into apartment buildings or workplaces where conventional bicycles are not allowed. This facilitates mixed-mode commuting, because a folding bike need not be parked in the street or train station. Folding also makes it easier to transport a bicycle in an automobile.
 Folding bicycles often cost more than non-folding bicycles with the same performance-related features, because they have more parts, to allow folding and to lock the frame when unfolded. This results in a more complicated design, which is more complex to manufacture; as well, there is a smaller market for this type of bike.
Folding bicycles are as safe as standard bikes, possibly safer. Naturally, some bikes are better made than others but this has less to do with the type of bike and more to do with the bike manufacturer.
Based on several folding bikes reviews and websites, Brompton and Dahon models seem to be the best folding bikes. These folding bikes fold quickly and easily. They are not bulky. They are ideal if you are traveling by train or bus and want to bring the bike on-board.
If you are looking for a high-performance road bike check out the Airnimal or the Bike Friday. These bikes are used worldwide for long-distance travel. Many cyclists who have tried these bikes found them to be an ideal mixture of performance and convenience.
Most folding bike manufacturers are producing high-quality products, but the issue of quality is not necessarily the measurement everybody uses when seeking out the best folding bikes.
1. Remove accessories on the top of the handlebar. This includes the lights, bell, etc. If your bike has V brakes, release the brake cables. Starting with the front brake, push the two brake calipers into the rim of the wheel to release the tension from the cable. Then lift the brake cable up out of the retaining clip and repeat with the rear brake cable.
2. Turn the bike upside-down. To protect your grips and saddle, lay out an old towel or something similar on the ground (or fork out the hundred bucks or so for a repair stand). Standing beside your bike, lean over it and grip the frame with your hands - one hand on the down tube at the front and the other hand on the seat post at the rear of the frame. Then lift up the bike and turn it over.
3. Remove the wheels. Open the quick release lever on the front wheel axle and lift the wheel out. Remove the rear wheel - open the quick release and, as you lift up the wheel, ease the rear cassette housing out of the dérailleur mechanism (the part with the two cogs).
4. Clean the drive system. Using the brush and some soapy water, start by cleaning the rear derailleur, working the brush into all the moving parts.
5. Wash the underside. Start by washing the front forks with a rag and soapy water, wiping them dry with a cloth as you go. In the same way, clean the centre and rear of the frame.
6. Wash and remount the wheels. Take a wet rag and start by cleaning the rims of the front wheel. Give the spokes a wash-down and clean the axle. If you have a disk brake system, use a degreaser, such as muck off or white lightning to clean the disc's.
7. Check the wheels. Spin each wheel, making sure it turns freely and that you can see that it's straight (true). As the wheel rotates, hold your fingers against the rims, to feel if there are any dents or knocks on either side.
8. Check the drive system. Check both pedals by spinning them, making sure that they turn freely and that there is no noise or grinding from worn bearings. If there is, you'll need to replace the bottom bracket.
9. Wash the topside of bike. Stand by your bike and grab the frame with both hands as you did before to turn your bike back up the right way. Then lean the bike against a wall.
10. Check the brakes. Test your brakes by standing in front of your bike, holding the handlebars. Apply the front brake and pull the bike towards you. The front wheel should not move at all and if you continue to pull, the rear wheel should lift up off the ground; otherwise, the brake will need adjusting.
11. Check the headset. Stand beside your bike, and holding the headset with your left hand, apply the front brake with your right hand and rock the bike back and forth. Make sure you cannot feel any slack or hear any knocking in the headset. If you can, your headset will need adjusting.
12. Lubricate the drive system. Place some rags over the rear wheel rims underneath the derailleur, to catch any oil drips.
13. Check the lights. Now reattach the lights and any other accessories you took off. Turn the front light on, making sure the light is bright, then do the same check with the back light.


 CADILLAC
 JEEP
JEEP
 HUMMER